My blog has moved!

You should be automatically redirected in 6 seconds. If not, visit
http://www.unpastiche.com
and update your bookmarks.

Tuesday, December 25, 2012

Two Years On...and I'm migrating (virtually)!

Merry Christmas everyone!

I decided that I should repeat the tradition of updating on Christmas. This year's Christmas is markedly different from last year's, mainly because I'm spending it overseas in Perth with another loved one of mine and I just had a 'barbie' on the beach. That's Aussie for BBQ! It was a novel experience, spending Christmas by the beach, enjoying the gorgeous sunset and the tasty food prepared by yours truly.

I decided that I should repeat last year's post by doing another walk down memory lane. The pickings this year are quite slim, because as compared to 102 posts in 2011, I only wrote 35 posts this year! That's a third but I guess it's understandable considering 2012 was when I got a full-time job which occupies probably 80% of my time.


My Most Beautiful Post and The Post That I Am Most Proud Of 
I guess macarons do photograph very beautifully. Last year's "most beautiful post" was my pink salted caramel macarons and this year, it's my ferrero rocher macarons. Not only were they beautiful, they were delicious too. The only thing I hate about macarons is how finicky it is. Perhaps I haven't got my technique right, but it always seems to be a hit-or-miss deal with me when I'm making macarons.


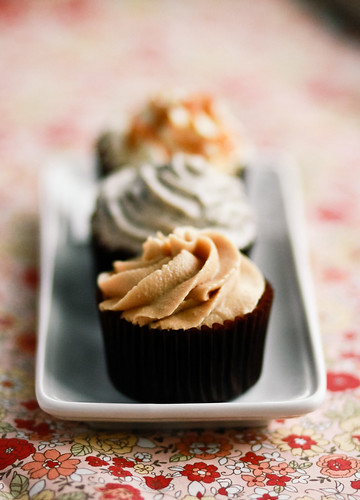
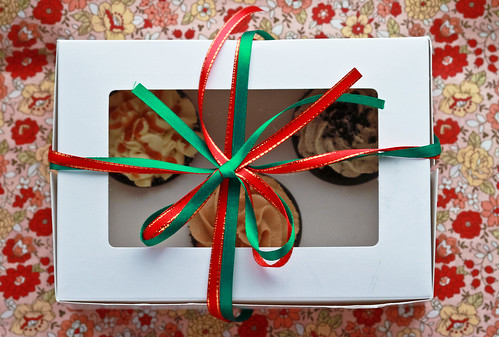
However, the post that I am most proud of, albeit not a complete post (ie without recipe), is my recent post on what I've been up to. So many reasons why I'm proud of it - I baked 300 cupcakes across 3 weekends, iced them with 12 different types of frosting, baked trays and trays of cookies, and single-handedly raised a sizeable amount for charity! I would definitely want to repeat this next year!


My Most Popular Post 
Again, the list of baking places in Singapore remains the most popular post. However, for a post done in 2012, that would have to be my list of Pizza Places/Pizzerias in Singapore. Come to think of it, my "lists" tend to be really popular, which I guess is good testimony to my information gathering skills (which is an important skill I cultivate on a daily basis thanks to my job).

I do have a few more lists in the pipeline, but as usual, I want everything to be almost perfect before I upload them, hence the delay. 


A Post I Feel Didn’t Get the Attention It Deserved 
Maybe because the photos I took were not spectacular but these chocolate sables were my best selling cookie during the Christmas Charity fair and has been my best cookie so far, according to both friends and family. It is also known as the "World Peace Cookies" by Dorie Greenspan, so do try them out for yourself if you haven't. I can assure you that you will definitely not regret it.

*****

With that, I have a very important announcement to make. For those of you who might have been clicking on the links above, you might have realized that you get sent to a domain called "un pastiche". That is my new domain =] The website is not completely up yet - I still have some remaining things to do like the header and updating the older posts which got screwed up in the process of migrating but I've decided to introduce you guys to my new home on 25 December because of the significance of the date :]

I had a few reasons for migrating, even though it meant losing some readers and the rankings for some of my top posts. One of the main reasons was that I wanted to have a brand which I could use on the products I am selling, which I am increasingly doing, and "not the kitchen sink" sounded a little odd on cake boxes and labels. I also wanted the freedom of my own domain, so well here we go! I spent a good part of the year looking for designers who was willing to do what I wanted within my budget, and boy did I get lucky with Kaiyi. She is a local blogger/designer whom I got to help me design my new blog. I was working with a really tight budget, but I wanted lots of frills for a small budget, and Kaiyi was the only one who fit the bill. And the end result was fantastic :]

I will be updating the blog on unpastiche.com from now on, so please bookmark that page or change your feeds to my new page. I will be holding a couple of giveaways soon in my new home as part of my 'housewarming', so please head on down and keep your eyes peeled! The giveaways are one of my biggest yet and will come from stash bought from Australia!

I'm tucking in early tonight for Boxing Day sales tomorrow - catch you guys around my new home at un pastiche!

Wednesday, December 12, 2012

Tricolor Chocolate Ogura Cake (三色巧克力相思蛋糕) or 'Xiangsi' cake

This is perhaps a very delayed post considering that I baked this some time ago when there was a fad to make this Ogura or Xiangsi cake on the local blogosphere but well, better late than never! Work is gradually slowing down, which is fantastic, because I will be going on leave from 21 December for a short holiday to clear leave (and to relax)! This will be my first Christmas spent in Australia, which should be pretty interesting since it's hot blazing summer there now and in contrast to the hot chocolate, mulled wine and whathaveyou in cold wintery Europe (and the rest of the Northern Hemisphere), Australia will probably celebrate with lots of seafood, fresh berries, light trifles, and loads of chilled wine. YAY! I might even be barbequeing my Christmas away, so I definitely cannot wait for 21 December to arrive! Hopefully the world doesn't end on 20 December or I will die a very sad soul. 

Back to the xiangsi cake. As usual, I am not particularly cautious when it comes to new recipes, especially when it is a recipe which has been raved about by others. So what I did was to gungho-ly try my hand at making my own version of a tricolor chocolate xiangsi cake.


I must say that given that it was my first try, the texture of the cake was pretty good, although the centre deflated because I didn't follow instructions closely enough and inverted the cake right after I took it out of the oven instead of waiting for a while before doing so. Subsequently for my other tries, I have merely cooled the cake in the tin without inverting and results have been great - no deflation, and the cakes are tall, fluffy and super cottony! My mom (and family) has given the (rare) thumbs' up for this cake! :]


For those not in the know, this cake probably originated from Family Bakery (芳鄰西點蛋糕) in Batu Pahat, in the state of Johor. It is about an hour's drive from where I stay, but alas, I have not been able to try the original version of this cake. Apparently, it is called Ogura Cake, but in Chinese, that translates to 相思蛋糕. 相思 literally means pining after someone or being lovesick. The phrase always reminds me of the Chinese poem (唐诗) of the same title, which I used to learn in primary school. I hope that the primary school kids now are still learning the poem, amongst others, and that it has not been removed from the syllabus because it is 'too difficult'.

Anyways, because this sponge cake is baked using the steam bake method, it has a similar texture to the japanese cheesecake or any other cake which is made using the same method. Check out the cottony texture below:


Tricolor Chocolate Ogura Cake (三色巧克力相思蛋糕)
Makes a 7" square cake
Adapted from Siew Hwei, but do check out Sonia's for very useful pictures and tips for a successful cake

A:
45g neutral-flavoured oil (I used sunflower oil)
55g milk
¼ tsp salt 
100g egg yolks (or yolks from 5 eggs)
65g all-purpose flour
½ tsp vanilla extract

B:
150-170g egg whites (or whites from 5 eggs)
65g castor sugar
½ tsp lemon juice 

C: 
3g cocoa powder
10g hot water

D: 
7g cocoa powder (about 1 tbl)
10g hot water 

E: 
10g milk 

Method:
  1. Place the rack at the second-lowest (slightly below the middle) position and preheat the oven at 160°C. Set the other rack at the lowest position. 
  2. Place all the ingredients in A in a small mixing bowl. Mix well and separate the batter into 3 equal portions/bowls. Mix the cocoa powder and hot water (from C) together, making sure there are no lumps. Mix it into one portion of the batter and set aside. Repeat for D and another third of the batter. Finally, add milk into the final third of the batter and set aside. You should now have three bowls of batter in 3 different shades - yellow, light brown and brown. 
  3. Place all the ingredients in B into another mixing bowl, and using your handheld or stand mixer,  beat until you get stiff peaks. Divide the meringue into three equal portions and fold each third into each of the three bowls of batter, making sure to fold gently until all the meringue has been incorporated. 
  4.  Starting with the darkest batter, pour it into a lined square pan (I used a 7" square pan). Next, pour in the light brown batter followed by the yellow batter. Lightly tap the pan against the counter to remove any air bubbles. 
  5. If you have two racks, place a tray of water on the lowest rack, and place your cake on the second-lowest rack to bake. If you only have one rack, you can place your cake into the tray of water and bake on the second-lowest rack or you can use small tart moulds or microwave safe bowls filled with water at the side of the pan to bake. 
  6. Bake for approximately 45 minutes at 160°C, or until a cake skewer comes out clean. Remove the cake and allow it to cool in the pan for at least 15 minutes before inverting it and removing the pan and liner. This is to ensure that the bottom does not deflate and that moisture does not collect on the liner, making the bottom of the cake wet and sticky. Allow the cake to cool completely on a wire rack before consuming. 

Sorry the photos are quite bad this time because it was at night and I had to make use of my dining table which has the most horrible spot lights and yellow lights :/ (Hence the different color tones in different pictures)

Janine's jots:
  • Taste: I love the sweetness of the cake, which means that it probably is not sweet enough for most people. For the chocolate variation, I would recommend using at least 70g of castor sugar or more. 
  • Texture: I love the texture. It makes the cake very light and very addictive! And the texture of the refrigerated cake is equally yummy!
  • Modifications: For a normal chocolate cake, just replace ingredients from C, D, E with 10-15g of cocoa powder and 25g of hot water. Use 10g for a less intense chocolatey cake and use 15g for a more chocolatey cake. You can also slice the cake in half to add cream if you don't want a plain cake. Also, as I have not used 6 eggs as most other recipes have recommended, my cake will not be as high should you choose to use a 8" square pan. 
  • Storage: As the cake has a high moisture content, do try to consume it within 2 days for the best texture. Otherwise, it would be best to keep the cake refrigerated. It can keep in the fridge for a week or more. 
  • Would I make this again?: Definitely! I have gone on to make this a couple more times, but without the tricolour effect and with other flavour variations. This is essentially a sponge cake with endless possibilities!


Sunday, December 2, 2012

What I've been up to lately

This is probably my longest absence from the blog - the last post was in September and it's already December! Time really flies, and I can't wait for Christmas to arrive! I was swamped at work for the past two months, and in November, I was swamped with orders for cupcakes and cookies, thanks to the company's charity food fair which I chose to participate in. 

So here's what I've been up to lately, in pictures. 

I've been up to my eyeballs in cupcakes - I made cupcakes for a 1st birthday - chocolate cupcakes with a vanilla cooked flour frosting (really delish btw!). Although the focussing and lighting, as well as the posture of my mother's hands below are a bit off, I really like it because of the lines and veins that are visible. Reminds me that my mom's hands are aging and so is she! Ps: belated happy birthday mommy!


Also for the 1st birthday party, some safari-themed cookies! Some of them turned out pretty good, but I wasn't too satisfied for the monkey and lion cookies because the icing separated and there were visible bubbles! =X Those became food for my dogs instead. 


Next up, the food fair I was talking about. I was mighty pleased with myself, because I managed to sell approximately 300+ cupcakes (consisting of pre-orders) and more than 20 jars of cookies! That raked in $2000 of funds for the Children's Cancer Foundation! =D If only my mom were around to help me bake - if she were and if my grandma weren't sick, I could have definitely taken in more orders, but well...family first! I sold 13 flavours of cupcakes (on hindsight, I might have been a bit too ambitious) and the flavours you see below are salted caramel, peanut butter and cookies & cream. Initially, I taste tested almost every tray of cookie and cake because I wanted to be sure of the quality but I eventually got a really bad sore throat and I decided that I was confident enough about my goods not to need to try every single tray. The cupcakes were quite well received and I must say that I have become quite adept at making cupcakes and frosting - so much so that I can confidently say that I can manage 100 cupcakes of a single flavour in a couple of hours! 


Another gratuitous photograph. This photo, as well as the one before and after this was taken with my new lens, a 85mm 1.8. I must say that I like the depth of field, but the shutter speed is a little slow :/


How christmassy eh? ;p


And finally, here's some of the cookies I sold at the fair. Most of them were very welcomed - especially my earl grey sable, vanilla sable and chocolate sable! Recipes to follow (soon I hope). 


Because it's been some time, I've been finding it hard to write a proper recipe post - but I do have a great number of backlog recipes to clear! Stay tuned for the recipes to the pictures above soon! :]

Sunday, September 23, 2012

The best buttery laminated pastry ever - Kouign Amann

If you asked me a couple of years ago if I would ever utter the words kouign amann (pronounced as quiee-ah-mahn) in Singapore, I would have thought you're nuts. But well oh well, with the great number of 'hipster' cafes and patisseries and bakeries popping up in Singapore lately, it appears that pastries like this king of laminated pastry has made its appearance in our sunny little island. 

I might be a bit slow on the take up since I never did patronize Tiong Bahru Bakery when it was hip since it was a tad out of the way for me, but when it opened at Raffles City, my kind colleague/roommate got me a croissant and in her words, "this thing that the staff recommended me to get". She couldn't remember the name of the pastry, but when I saw it, I had a little sneaking suspicion that this might be a kouign amann, but I wasn't very sure because from my experience, kouign amanns generally look more rustic and bread like whereas Gontran Cherrier's version looked a tad puff pastry/danish like. Nevertheless when I bit into the pastry, I was sure. Nothing else in this world can taste so sinfully buttery and sugary!


I first got a taste of this heavenly pastry when I was in Paris. I had been stuffing my face silly with macarons, entremets and sweet gâteaux and was growing quite sick of them. Although I like cakes, I'd much prefer pastries and breads. So naturally I did some googling to check what other pastry I should have other than the usual croissants and danishes, and I stumbled upon this mysterious pastry known as the kouign amann. 

Call me crazy but I still remember my first experience of the kouign amann. Jon and I had been walking along Champs-Élysées hunting for a nice leather jacket when we stumbled upon Ladurée. I guess we might have been lucky because the queue was not that long and I even managed to get a couple of photographs of the interior before the staff told me 'no photos'. I got myself the usual - a box of macarons, a croissant, and I pointed to the kouign amann. Back then, I didn't speak French and  naturally didn't want to embarrass myself by massacring the pastry's name. I remember that it smelled delicious, of caramel and butter, and even before I stepped out of the store, I had already slid it out of its paper bag to devour it. My first taste was almost like ambrosia. Until that point in time, I had never ever eaten any pastry that was so deliciously good. I knew I shouldn't have offered any to Jon because he then proceeded to demand that I share this delicious pastry with him. I don't remember where else we went in Paris that day, but I knew that the best memory of the day was walking along the Champs-Élysées, and the Arc de Triomphe whilst devouring the kouign amann. 

Last year, after mastering the art of laminated dough, I decided it was time that I make my own kouign amann and relieve those wonderful memories. You might notice that my kouign amann looks very different from the one that Tiong Bahru Bakery is selling, but I would think mine is a more accurate version - after all, kouign amann is Breton for butter cake and according to wiki, it is a "round crusty cake, made with bread dough containing layers of butter and sugar folded in" ;p


I finally decided on David Lebovitz's Kouign Amann recipe as opposed to Ladurée's because of the crazy amount of sugar and butter that Ladurée's had.  

Kouign Amann
Fills an 8" round cake pan

12g dried yeast (or 5g of instant yeast)
175g (¾ cup) warm water
260g all-purpose flour, plus extra for rolling out the pastry
½ teaspoon sea salt
200g castor sugar, divided, plus extra for rolling out the pastry
110g salted butter, cut into 2-cm pieces

Method:

  1. In a mixing bowl, dissolve the dried yeast in the water with a pinch of sugar. Stir briefly, then let stand for 10 minutes until foamy. If using instant yeast, you can skip this step and add yeast together with the flour. 
  2. Gradually stir the flour and salt into the mixing bowl. The dough should be soft, but not too sticky. Lightly dust your countertop with flour and transfer the dough onto it.
  3. Knead the dough with your hands until the dough is smooth and elastic, for about 3 minutes. If the dough is very sticky, gradually add more flour, about 10g or one tablespoon at a time, until the dough doesn’t stick to your hands. Gather the dough into a bowl and place it into a lightly oiled bowl. Cover and let it rest in a warm place for about 1 hour, or until the dough ball has doubled. 
  4. Then, on a lightly floured countertop, roll the dough into a rectangle about 12″ x 18″ (or 30 cm by 45cm) with the shorter sides to your left and right. If you would like a step-by-step illustration, do pop by David Lebovitz's page!
  5. Mentally divide the rectangle into three equal portions and distribute all the butter cubes in the centre of the dough. Sprinkle 50g of sugar together with the butter cubes. Grab the left side of the dough, lift and fold it over the center, and do the same with the right side (like a letter). 
  6. Then, sprinkle another 50g of sugar along this rectangle and mentally divide this rectangle (it should be about 15cm by 30cm) into three equal portions again. Fold the left over the centre and the right over the left, like in the previous step. You should get a 10cm by 15cm rectangle. Place this on a lightly oiled plate and place it in the fridge for 1 hour. Once chilled, remove the dough from the fridge.  
  7. Dust the countertop with sugar (instead of flour) and roll out the 10cm by 15cm rectangle into a 30cm by 45cm rectangle again. Sprinkle the surface of the rectangle with another 50g of sugar and fold it into thirds, per step 5 again. Place on a lightly oiled plate and let it rest in the fridge for another 30 minutes to 1 hour.
  8. Preheat your oven to 220°C (425°F) and brush the 8 inch cake pan with melted butter. Remove the dough from the fridge and roll it into a circle about the size of your baking pan. The dough might be sticky, so use sugar to lightly dust your countertop. Sprinkle the top of the dough with the remaining 50g of sugar. You may wish to drizzle some melted butter as well. 
  9. Bake for about 40 minutes, or until the top is brown and deeply caramelized. Remove from the oven and let it stand for 15 minutes before running a knife around the edges to release the Kouign Amann. Let it cool for at least an hour before consuming. 


Janine's jots: 
  • Note: Like what David Lebovitz recommended, be sure to use good quality salted butter because it will make a difference. If you don't have access to a good French salted butter (like say Elle & Vire being the most commonly available in Singapore and Malaysia), use normal salted butter and sprinkle some coarse fleur de sel or sea salt on the butter cubes. Also, if you have the luxury of an air-conditioned kitchen, do use it because the dough is very sticky and the sugar melts very quickly, so you have to be quick. As you can see, my layers weren't very prominent because my warm hands caused the sugar to melt soooo rapidly and the butter and sugar just leaked across the layers. 
  • Taste: I found this kouign amann to be slightly less sweet than what I recalled, and definitely not as sweet as Tiong Bahru Bakery's, but it was just nice for me. 
  • Texture: I must admit I deviated from David Lebovitz's method, which was a bad thing. I tried to be ambitious and did the letter-fold four times instead of three as prescribed, and this caused the dough to be slightly more tough and the end product more bread-like. Ideally, this should have less folds than a puff pastry or a croissant. 
  • Serving size: I'm quite used to seeing the kouign amann in this cake-slice version, but Pierre Herme does it individually in large muffin cups whereas Tiong Bahru Bakery does it like a pinwheel. Naturally, the individual portions means more caramelized bits(!) and more yumminess but this round cake version is equally tasty as well, and definitely more rustic. This recipe will feed 8 people comfortably. 
  • Storage: It keeps quite well for about 3 days at room temperature, but I would definitely recommend storing it in the fridge and heating it up with the microwave. 
  • Would I make this again?: YES definitely! If I had to pick between a danish or croissant or this, I would definitely choose this anyway. Plus, so many people who tried this sang praises of it. Jon's friend called it "the awesome thing" :] There are a couple of methods and recipes to making the kouign amann and after I work off all the extra butter and sugar, I'll get down to experimenting with those recipes, especially Ladurée's version!

Tuesday, September 11, 2012

Luna Park, North Sydney and Hokkaido Milk Buns with Red Bean Paste (with tangzhong)

Over the weekend I finally had time to upload photos from my CF card (containing photographs I took while I was in Sydney almost 2 months ago) onto my computer. It made me feel a little sad, because those days were so carefree and for the month I was there, it was the first time when I didn't have to study because I had no exams sit for and there was no work to worry about, because work had not started. I basically did what I loved - planning for my meals, shopping for ingredients, and cooking for my loved one :] We also found time to go for holidays and attend church on the weekend. 

It's been a long time since I went to church in Singapore, but I must say that the people at CCC made me feel so welcome. I enjoyed the services because well, the sermons were about church history and me being a history/knowledge buff, I practically soaked up the information on the reformation period. Everyone was so friendly and inclusive that I decided to bake a couple of cakes and cookies each time I attended church. I must admit that I had an ulterior motive, because all those people at church just meant for guinea pigs for my baking, but well, I felt good because everyone only had good comments for the stuff I baked heh :]


To start off, I decided to stay safe and stick with stuff I knew, so I made a hokkaido milk buns with red bean filling. I knew that this would be popular because soft Asian-style breads in Australia don't come cheap and well, most of the people at church were Asians, some of whom have been born in Australia, some of whom are studying in Australia for a couple of years.


CCC is over at Milsons Point, which is in North Sydney. The view of the Sydney Opera House you see above, is from Milsons Point. The only other way of getting the same view is to take a ferry from Circular Quay to places on the other side, to Watsons Bay and the like. The north shores of Sydney are not much of a tourist attraction, which perhaps explains why I have never step foot to places like Chatswood (a very Asian-populated area) and North Ryde. There's lots of good Asian food there, with huge shopping malls that Singaporeans and Malaysians are acquainted with, but I think I very much prefer Sydney on the other side of the river. 


Because it was winter, it was pretty cold most of the time, but on my last visit to church, I decided that I should head out to the area regardless and take some photographs. Looking at the photograph above, you would think that it's spring in Sydney, but the outfits of the two ladies reminds you noooooo it is winter and with the winds blowing in  your face, it's effing cold! I snapped a couple of quick photographs around the area before heading to Luna Park to take a snap of its very iconic entrance. 

Luna Park is an amusement park which has a history stretching back to the 1930s, which explains why the entrance is so...well 1930s. It gives me the impression of old-school amusement parks in America, even though I've never been to America and have never seen an amusement park there. 


I particularly like the two photographs above, the left has been processed to evoke what I think is a 1930s mood, and the right has been changed to black and white just because. I like how the face of the clown is nicely reflected in the puddle (it had rained earlier) on the ground. There was a father with his son of about 6 years of age, and I particularly enjoyed listening in to their conversation. The father was standing a couple of meters beside me when I was taking the photograph, and having spotted me squatting and taking a photograph of the puddle, the reflection and the entrance, he took the opportunity  to teach his child something about science. He first asked his son what he saw when he looked into the puddle of water and then explained how this reflection came about. There is so much to learn everywhere, and I really admire the dad for showing his child that, at such a young age. I would want to be such a parent, if I ever have a child in the future.

So back to my hokkaido milk buns with red bean filling (北海道牛奶紅豆麵包). I decided to use a japanese style hokkaido milk bread recipe, because I wanted to make full use of the delicious tasting cream I had in Sydney. 


Instead of following the proportions in Christine's recipe above, I decided to modify it a little, to fit the proportions that I am used to.

Hokkaido Milk Toast
Makes 1 500g loaf or 8 medium sized buns

270g bread flour
30 g all-purpose flour
40g sugar
½ tsp (4g) salt
1 tsp (5g) yeast
45-50g egg (without shell)
40g heavy cream (at least 35% fat)
30g full fat milk
100g tangzhong*
25g unsalted butter

*Check this post if you don't know what is tangzhong and how to make it (for 100g, you need to heat about 20g of flour with 100g of water)

To make them into red bean buns, you will need about 500g of red bean paste. I used a storebought one when I was in Australia. I recommend getting the red bean paste from DAISO for those in Singapore/Malaysia. Do get the packet of anko which is produced in Japan and not China.


Method: 

  1. If using a bread machine, follow directions as per your machine, but add the tangzhong together with the flour. If kneading by hand or mixer, place the sugar, salt, bread flour, all-purpose flour and yeast into a large mixing bowl. Then, add milk, cream and egg into the bowl and knead until a rough dough is formed. Add in the softened unsalted butter and knead well, until the dough no longer sticks to your fingers but is slightly tacky.
  2. Shape the dough into a ball and cover it. Allow it to proof for about 60 minutes or until doubled.
  3. Punch down the dough and divide it into pieces weighing 60g each. Allow the balls to rest for about 10 minutes before attempting to shape them. In the meantime, measure out 30-40g of red bean paste (how much depends on how much red bean you like. I used 30g) and roll them into an equal number of balls.
  4. On a lightly floured surface, flatten a dough ball into a round disk. Place the ball of red bean paste in the middle of the disk and wrap the filing with the dough. Pinch the ends together to ensure that each dough ball is completely sealed. Then using your palms, slightly flatten each ball until you get a flat round disk of about 5-8cm thick. Using a sharp knife or scissors, snip the edges of the disk. I made 6 snips to get 6 petals. Be sure to make very deep cuts all around the dough because as the dough proofs, the cuts will become shallower.
  5. Allow the 'flowers' to proof for another 30 minutes or until they have increased about 1.5 times in size. Brush the top of each flower with some egg wash or milk if desired.
  6. Bake in a preheated oven of 180°C for about 22 - 25 minutes, or until golden brown. Remove from oven and allow to cool on a wire rack for at least 30 minutes before consuming. 

Janine's jots: 
  • Note: I kinda overbaked the breads because they are NOT supposed to be this brown. You should keep an eye on what you're baking, especially if you're using a foreign oven in a foreign environment! I liked it the dark brown crusts though ;p Do also try to make your cuts deeper. I made pretty shallow cuts and this was the result after proofing the second time.
  • Taste: I liked the proportions of my bun - 30g of not-so-sweet red bean paste to 60g of bread dough. I would however recommend using 40g or more red bean paste because as you can see, besides needing more work on my 'putting the red bean ball in the centre' skill, the red bean filling is quite stingy.  
  • Texture: I didn't have the benefit of a mixer or bread machine, so I made the buns completely by hand. Because it was cold in Sydney and because I was lazy, I did not knead the buns until the 'window pane' test could be passed. This meant that the bread is not as elastic as it should be - you can see from the photo above that the bun does not have that many gluten strands. Also, because it was winter, the buns took twice as long to proof - I made the dough the night before and thanks to the chilly night, it took about 6 hours to double in size.
  • Serving size: This recipe makes a really nice rectangular hokkaido loaf but I would think a portion of 8 red bean buns would be ideal for any family too! :]
  • Storage: Because of the high fat content of the buns, they keep quite well. I would think they should keep for at least 3 days at room temperature. I kept one bun in the fridge and reheated it a week later and it still tasted pretty good.
  • Would I make this again?: I would definitely make this recipe whenever I have excess cream! I personally prefer leaner breads but most people I know and those who ate the buns liked the rich and buttery taste of the bun, so I guess if you're looking for a sweet bun recipe, this is it! 

Friday, September 7, 2012

List of Baking Ingredients in Singapore [Names of Sugars/Sweeteners (糖类) and uses]

I first had the idea of doing up this table because I was toying with the idea of going sugar-free (another failed idea) and at the same time doing research into sugar substitutes for my diabetic family members - remember my post on sugar-free chocolate cookies? I realized that knowing about the different types of sugars available in the market helped me in my decision making. I learnt what sugars to use and how it would affect my baking and whether it was beneficial (or not) to my health. So I’m hoping that this table will act as a jumping board for you to understand more about sugars too! 

Did you know that the word “sugar” traces it etymology from the Arabic word “sukkar” which traces its origins to the Sanskrit word “sharkara”? Now I know why Middle Eastern and Indian treats are so sweet ;p

Being one of the five basic tastes, you can be sure that there are many varying degrees of ‘sweetness’ and naturally many different types of sweet things contributing to that sweetness. Science and technology has developed such that not only are we able to derive/extract natural sugars from existing products, we have made ourselves artificial sugars too.

From my list for flours, I'm sure you can tell that I'm a 'list-y' person, but I've done sugars a bit differently, because I haven't done research as to what are the other names for sugars besides those names in mandarin, but I thought it would be more useful if I included a section on how these sugars are derived and how to substitute/use them in cooking/baking. Below is a list of both artificial and natural sugars, with common names as well as comments on each sugar. I have tried to include cooking tips and substitutions where possible.

And the most important takeaway for today is - did you know that besides those rows which are labelled as 'sugar, XX', the other sugars are technically not known as sugars? What do I mean? Well, I mean that if the product has say agave nectar or xylitol - it will be marketed as "sugar-free" or "no sugar added". And ignorant consumers will be fooled into thinking that the product has no sugar at all - which is technically true since that ingredient is not known as 'sugar'. So be aware alright!

For purposes of full disclosure and crediting, I have referred to a number of websites (particularly wiki) for the below information but have painstakingly put all that information together in the table below. 


English name
Other names
Comments (how it is made, how to substitute with white sugar, etc)

Artificial sugars or ‘sweeteners’ (E95X – E96X)
Acesulfame Potassium or K
Sold as Sunett or Sweet One
It is 200 times sweeter than white sugar but has zero calories. It is typically used as a sweetener in protein shakes.

Aspartame
Sold as Equal, NutraSweet, Canderel, 代糖, 阿斯巴甜

Same as above, although it is more prevalent in many food products like diet soft drinks, breath mints, etc.
Neotame
Made by NutraSweet, not sold to consumers
This is between 7000 and 13000 times sweeter than white sugar!!! Seldom used in food products yet because only recently ‘invented’.

Saccharin
Sold as Sweet 10, Sweet ‘N Low
Another non-caloric sweetener, as above.

Sodium cyclamate
Sold Sweet ‘N Low
30-50 times sweeter. Typically used together with saccharin. It is banned in US FDA although sold in other places.

Sucralose
Sold as Splenda, Sukrana
It is 600 times (!) sweeter than white sugar. This is another sweetener safe for diabetics and it also does not promote dental cavities.

Did you know that sucralose is manufactured from a factory in Jurong in little Singapore?

Natural sugars
Agave Nectar
Also known as Agave Syrup or Blue Agave Nectar or Amber/dark agave nectar
It is about 1.5 times sweeter than white sugar and is made from the nectar from core of blue agave plant. It consists of fructose and glucose. It is sweeter, but less viscous than honey and is typically used as a vegan alternative to honey.

Cooking tip:
- Substitute ¾ cup of agave nectar for 1 cup of white sugar.
- Reduce temperature by 5-10°C to prevent overbrowning.

Beet sugar

This sugar is obtained from the sugar beet, and accounts for some 20% of the sugar production in the world. This is less popular in Asia since sugar beets are only found in temperate countries, whereas sugar canes are found in our tropical climes.

Brown rice syrup
Also known as rice syrup (if white rice is used), rice bran syrup
Made by cooking rice with spouted barley to break down the starches, straining the liquid and cooking until thickened. It contains glucose, maltose and maltotriose. It has a higher GI than sugar but is about half as sweet, so diabetics beware, this is not something you should take in excess!

Corn syrup, light/dark
Also known as glucose syrup, 玉米糖漿

Food syrup made from the starch of maize.  This is NOT high-fructose corn syrup (HFCS), which is a sweeter compound than plain corn syrup and is made by processing corn syrup further. This is used widely in USA (together with HFCS) because of the corn subsidies there.

Coconut sugar
Also known as shakkar, gula melaka
Made from the sap of the coconut palm flower instead of the tree. Traditionally used in Southeast Asia. Has a low GI and has a higher mineral and amino acid content.

Different from palm sugar (see below).

Dark treacle
Black treacle, molasses
Treacle is made from the syrup that remains after sugar is removed in the refining process, ie, a by-product of the sugar making process.

You can substitute molasses or blackstrap molasses for treacle, although molasses tend to be more bitter.

 
Date sugar
-
Made from ground, dehydrated dates. It does not dissolve in liquid and burns easily.

Dried sugar cane juice
Evaporated cane juice or unrefined sugar
Made with the same process as demerara – by extracting juice from sugar cane and evaporating liquid until it crystallizes.

Erythritol
-
Natural sugar alcohol extracted from fruits and fermented with yeast. No calories. Less likely to cuase gastric side effects as compared to other sugar alcohols. About 60% as sweet as white sugar.
Fructose
Fruit sugar, 果糖
Derived from natural sugars of fruits and vegetables. 1.73 times sweeter than white sugar (sucrose).
Golden syrup
金黃糖漿, light treacle, pale treacle, cane syrup
A mixture of invert syrup and sucrose.

Other substitutes
- Combine two parts light corn syrup plus one part molasses
- Combine equal parts honey and corn syrup
Glucose
Also known as dextrose, grape sugar, 葡萄糖漿
A simple sugar (monosaccharide) which is the ‘fuel’ of most bio-organisms, including plants.

Honey
蜂蜜糖
Highest sugar content of all the natural sweeteners.

Cooking tip:
- Substitute ½ cup of honey for 1 cup of white sugar. 
- Reduce the liquid in the recipe by ¼ cup and increase baking soda by ¼ tsp. 
- Reduce the oven temperature by 5-10°C to prevent overbrowning.

Invert sugar
轉化糖
Created by combining sugar syrup with an acid compound, breaking it down to glucose and fructose.

Isomalt

A sugar alcohol. As with most sugar alcohols, there is a risk of gastric distress when consumed in large quantities because the body treats it as a dietary fibre instead of a simple carbohydrate.

Jaggery
Also known as Gur, Kalkandu, Gula Merah, Rapadura
Made from the sugarcane or date palm tree. It is a concentrated product of cane or date juice without the separation of molasses and crystals. It is widely used in Indian cuisine and has religious significance to Hindus. Ayurvedic treatment, if you subscribe to it, recommends jaggery for throat ailments.

Lactose
Milk sugar
A natural sugar occurring in milk, it is only about 20% as sweet as white sugar (sucrose).

Luo Han Guo
Lakanto, Monk fruit
羅漢果, 罗汉
Natural sweetener and has low calories. The fruit contains lots of Vitamin C too! Because it is native to China, it’s of no surprise that TCM uses it quite a bit and it is easily available at Traditional Chinese Medical Shops in its dehydrated form.

Malt syrup/ Maltose
barley malt syrup, dark malt syrup,
麥芽糖
Maltose is typically produced by germinating cereals, hence the name “barley malt syrup”. It is typically used in China, Taiwan and Hong Kong as a sweet. Malt can be used to increase the 'sugar' in your breads and it is typically used in breads (and beer of course). PS charsiew gets its gloss from it too!

Common substitutes include molasses, rice bran syrup or maple syrup.


Maltitol
Maltitol syrup
A sugar alcohol which is about 75% as sweet as white sugar but with fewer calories. It is typically used as a sweetener for hard candies and chewing gum. Note that excessive consumption will result in diarrhea!
Cooking tip:
- Substitute 1½ cup of maltitol syrup for 1 cup of white sugar. 
- Reduce the liquid in the recipe by ¼ cup or increase flour by  ¼ cup and increase baking soda by ¼ tsp. 
- Reduce the oven temperature by 5-10°C to prevent overbrowning.

Mannitol
Manna sugar or mannite
Naturally found in seaweeds and many other plants. Its pleasant taste makes it popular as coating for hard candies, chewable tablets, chewing gums, etc.

Maple syrup
楓糖漿, 楓樹糖漿, 楓糖
A syrup made from the sap of the maple tree, it was first used by the aboriginal people in North America. Maple syrup is a good source of manganese and other minerals. It is graded on color, with Grade A being the lightest in color (and the one that goes superbly on pancakes)!
Cooking tip:
- Substitute 0.75 cup of maple syrup for 1 cup of white sugar. 
- Reduce the liquid in the recipe by 3 tablespoons and increase baking soda by ¼ tsp. 

Molasses
Treacle, 黑蔗糖漿, 糖蜜, 甘蔗糖蜜
Dark thick residue left over from making sugar from sugar beets or cane. Sugar beet molasses is typically too bitter for human consumption and is used as a medium for growing yeast.

Light molasses are the residue from the first round of boiling whereas dark molasses are residue from the second round of boiling.

Molasses are also a traditional ingredient in gingerbread and rye bread.
Cooking tip:
- Substitute 1½ cup of molasses for 1 cup of white sugar. 
- Reduce the liquid in the recipe by ¼ cup and increase baking soda by 1 tsp. 
- Reduce the oven temperature by 5-10°C to prevent overbrowning.

 
Molasses, blackstrap

These are molasses derived from the third boiling of sugar cane syrup. It is high in calcium, magnesium and potassium, as well as iron, making it extremely beneficial for those suffering from iron deficiencies (ahem, menstruating women!).

Non-diastatic malt

It is a dried barley malt syrup, and is used in bread making as a sweetener.

Palm sugar
椰糖, 爪哇紅糖

This is made from the sap of the stems of palms.

Sorbitol syrup
Glucitol, rice sorbitol syrup
This is another sugar alcohol (polyols), but is only about 60% as sweet as white sugar. It is typically used commercially.

Sorghum syrup
Sorghum molasses or sweet sorghum syrup
This is the the product from boiling down sorghum cane juice. Typically used in Southern US.

Sucanat
Short for “sucre de canne naturel”
This is a brand name for whole cane sugar which is made by crushing sugar canes then extracting the juices and heating it to create the sugar granules. It is essentially dehydrated cane juice and is approximately 13% molasses and 87% sugar.

 
Sugar, black
黑糖, 红糖, 赤糖、紫糖
This is a sugar predominantly popular in Asia, especially Taiwan. It is basically unrefined sugar from the sugar cane. Like molasses, it is very high in iron and other minerals, and is often used to reduce menstrual pains. 
Sugar, brown
黃砂糖
Refined white sugar which has some molasses added back to it for flavor and color.

Sugar, castor
細砂糖, 幼砂糖, 幼糖
Caster sugar, superfine sugar
Very fine granulated sugar, fine enough to fit through a sugar ‘caster’.
Sugar, coarse
Sanding sugar, decorating sugar
Coarse sugar is recovered when molasses-rich, sugar syrups high in sucrose are allowed to crystallize. The large crystal size of coarse sugar makes it highly resistant to color change or inversion (natural breakdown to fructose and glucose) at cooking and baking temperatures. These characteristics are important in making fondants, confections and liquors.

Sugar, confectionary
Confectioners’ sugar, Powdered sugar, icing sugar, snow sugar, 糖粉
Mechanically crushed so that no crystals remain. Sometimes mixed with cornstarch or anti-caking agent  to keep it from clumping
Sugar, dark brown
紅糖
Combination of molasses and white sugar

Sugar, demerara
金砂
Similar to muscovado sugar, it has large light brown, irregular grains. The grains are usually larger than those of turbinado sugar. It has a natural molasses flavouring and

Sugar, muscovado (dark or light)
粗糖, 黑砂糖, moist sugar or Barbados sugar
Another type of raw sugar, this is more popular in Asia. It is made up of large brown sugar crystals which are high in mineral content, dried without spinning in a turbine. It is more moist than normal brown sugar and has a strong molasses flavour.

Sugar, rapadura
Panela, panocha
Another type of unrefined whole cane sugar, this is more typical in Latin America and is high in dietary iron.

Sugar, raw cane, unrefined
原蔗糖
Raw sugar is light brown/tan in color and it is the product that you get at the point right after the sugar cane has been processed and refined.

 
Sugar, refined, white, granulated, table
Saccharose
白砂糖, 砂糖
To many people, this is what sugar is. Small white crystals which are the product from heating, crystallizing and drying (and bleaching) sugar cane.
Sugar, rock 
Chinese rock sugar, yellow rock sugar, 冰糖
Clear or white or yellow crystals made by slow cystallisation from a saturated sugar solution.

Sugar, turbinado

Another type of raw sugar, turbinad is medium brown in color and is found in the form of large crystals. Turbinado sugar is made from the crystallisation of heated pressed liquid of sugar canes which is later spun in turbines and centrifuges to speed up the crystallization and drying process. Hence the name turbinado!

Stevia (honey leaf)
蜜葉糖,甜葉菊
Sold as packaged stevia – Sweetleaf, Truvia, Purevia
Calorie free natural sweetener from a leaf. This natural sweetener has long been used in Japan, but has been gaining popularity in USA, Europe, and other parts of Asia. In its original ground version, it is green and can be found in Chinese medical shops in Singapore/Malaysia. If you buy the packaged/refined versions, it is available as white crystals or clear liquid.

Vegetable glycerin
Glycerin, glycerine, glycerol
It is about half as sweet as white sugar, but has more calories than white sugar. It is typically used commercially as a thickener or filler, just see if there’s “E422” in your food label. That’s glycerol.

Xylitol

Low-calorie sugar alcohol from birch trees.

Yacon syrup

Made from the root of the yacon plant, which is indigenous to the Andes mountains. Has low calories and is suitable for diabetics.

Related Posts Plugin for WordPress, Blogger...