
Writing the first entry for my virgin food blog is harder than I thought it would be. First, I had to decide which pictures made the final cut, and considering how much I fumble around in the kitchen, there weren’t a great variety of photographs to choose from. Then, I had to edit some of the photos because of the white balance; and finally, the actual crafting of this blog entry which took eons since this is the first time I’m writing something like this. I have been procrastinating over writing (or doing anything productive), but I figured that Christmas would be a good time to mark this virgin entry (although this entry was written a few hours before 25 December itself). Let this be 2010’s Christmas gift to myself, and may it still be in my life when Christmas 2011 comes around, considering the short lives of my many other pursuits.
So, back to (baking) business. This is perhaps the first recipe that had all around approval from my family members. God knows it’s the first recipe where I didn’t have any leftovers to deal with. And this comes at an opportune time, when I’m disappointed in other areas of my life (cue: results from school). I’ve been wanting to try out this tangzhong method that I’ve been reading about in some of the baking blogs I stalk on a daily basis, and I finally got my buns (pun intended) down to doing it yesterday night.
Here's the recipe for Japanese soft rolls using the tangzhong method.
First, what is the tangzhong method?
Tangzhong is hanyu for 湯種法, also known as the water-roux method. This technique was created by Japanese bakers (known as Yukone method) to increase the water content in breads. I’ve been blog-stalking a huge bit lately, and it appears that this method has been circulating ever since 2003 when Yvonne Chen’s “Bread Doctor” book was published.
How does the method work? In short, the heating of the 1:5 flour and water mixture encourages more water to be absorbed. To indulge the food chemist in me (and anyone else), the longer explanation is that starch is present as granules in flour. Starch is a mixture of two carbohydrate polymers, amylose and amylopectin. Different starches contain these two polymers in different proportions. Wheat contains about 25% amylose and 75% amylopectin.
I have illustrated the process in the diagram below.
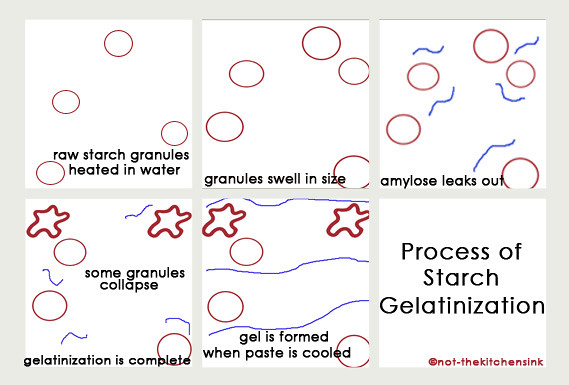
- Starch granules are insoluble in cold water.
- When heated in water, they gradually absorb water and swell in size, causing the mixture to thicken.
- Amylose migrates out of the granule.
- With continued heating, the granules take in more water and finally, fragment, resulting in the mixture becoming less thick. This process of granule swelling and fragmenting is called gelatinization.
(Sources: here and here - this is in chinese)
The tangzhong is made when the paste reaches 65°C. However, for most people without a thermometer handy, it is not necessary to achieve such an accurate temperature. Basically, gelatinization occurs anywhere from 55°C to 85°C, depending on the type of starch, so just place 1:5 flour to water in a small pot on low heat, and stir, either with a whisk or even a spoon. A few things to note: put on low to medium heat because it doesn’t take too long for the paste to reach 65°C! I made a mistake and placed my first attempt on medium to high heat, and the mixture turned lumpy because I did not have a chance to mix the flour and water well before it thickened.
Once your whisk leaves tracks, the paste is done! It takes about a minute or two, and don’t worry if the mixture is slightly runny – it is meant to be that way! The picture below shows my cooled tangzhong which is ready to use in the recipe. If you are a graphic person, this link provides more photos to indicate what the final product should look like.
Once your whisk leaves tracks, the paste is done! It takes about a minute or two, and don’t worry if the mixture is slightly runny – it is meant to be that way! The picture below shows my cooled tangzhong which is ready to use in the recipe. If you are a graphic person, this link provides more photos to indicate what the final product should look like.
 |
| Final Product |
For the tangzhong:
25g bread flour
125ml water
Method (for tangzhong):
For the bread:
- Mix flour with water thoroughly to remove lumps. Place over low to medium heat and stir consistently with a whisk.
- Mixture will thicken and once tracks appear, the tangzhong is done. Remove from heat.
- You can either transfer the paste to a clean bowl and cover with a cling wrap to let cool or personally, I just place the lid on top of the pot to let it cool, because the film that might form when the mixture cools does not affect the final product much anyway. Note that this paste is not like a sourdough starter or sponge, so letting it ‘age’ in the fridge will not enhance the flavour.
- This produces slightly more than 120g of tangzhong required below.
350g bread flour (I didn’t have enough, so I replaced 100g with all-purpose flour which worked fine)
55g castor sugar
1 tsp salt
56g egg (or equivalent of 1 large egg)
7g milk powder (optional)
125ml milk
120g tangzhong (from above)
5g instant yeast
30g butter, softened and cut into small pieces
Method (for bread):
- Combine all dry ingredients (flour, salt, sugar and yeast) together in a clean bowl. In another bowl, combine the wet ingredients (milk, egg and tangzhong).
- Make a well in the centre of the dry ingredients and add in the wet ingredients.
- Knead until the gluten has developed – when you can pull apart the dough without it falling apart, and add in the butter. Continue to knead until the dough comes together and is not sticky.
- This takes about 10-15 minutes of hand kneading and it is a very very messy process. I transferred the dough to knead on the counter top, and liberally added flour on the surface to help in my kneading.
- Once the dough passes the ‘window pane’ test, knead the dough into a shape of a ball and place it in a greased bowl and cover with a damp tea towel (or cling wrap).
- Let it proof until doubled in size (it takes close to an 1 hour in my kitchen)
- Once doubled, transfer the dough to a floured counter top and divide the dough into equal portions (these will dictate how many buns you will have). I divided mine into 6 portions and kneaded them into ball shapes to rest for 15 minutes. This is to allow the gluten to relax a little.
- At this juncture, if you want funny shapes, proceed to roll the portions into whatever shapes you want. I shaped the portions into tighter balls by pulling the ends towards the centre and placed them seam-side on the tray. Let them proof for another 40 minutes to an hour, until doubled in size.
- Brush some milk (or whisked egg) on the surface of the balls (this will give it a nice browned shine) and bake in a pre-heated 180°C oven for 20 minutes.
- Remove from the oven and transfer to a wire rack to cool before eating :)
In pictures
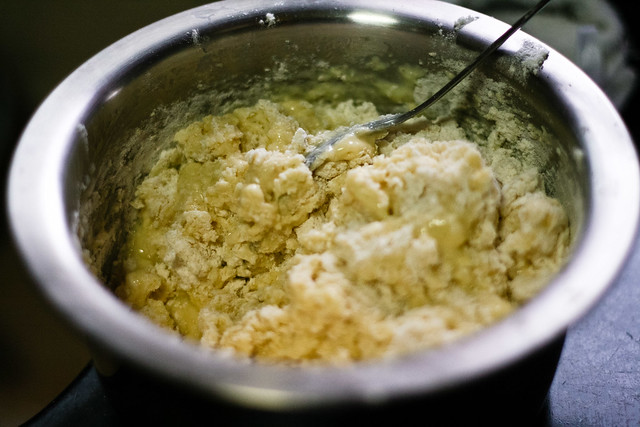 |
| 1. Mix wet ingredients into dry ingredients and knead. |
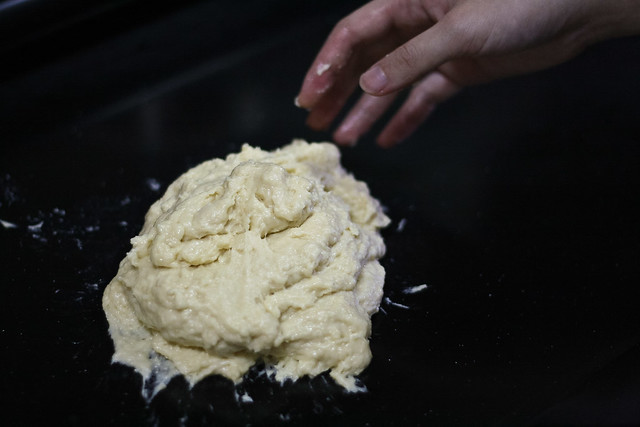 |
| 2. After adding butter, knead until dough comes together. |
 |
| 3. Knead dough into a ball shape and proof in a well-greased bowl. I used the same bowl that I used for proofing because I'm lazy to wash too many dirty bowls :/ |
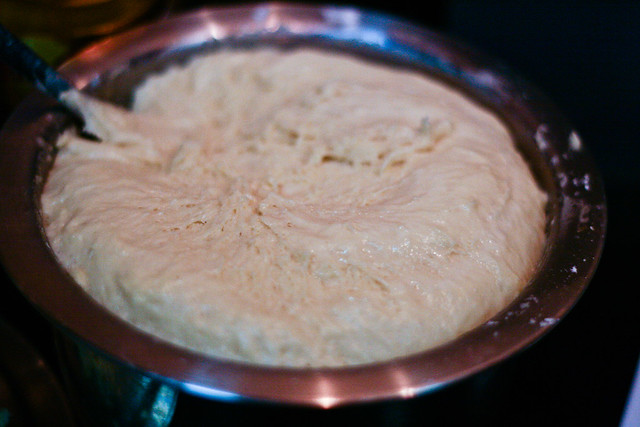 |
| 4. After an hour, the dough would have doubled in size. |
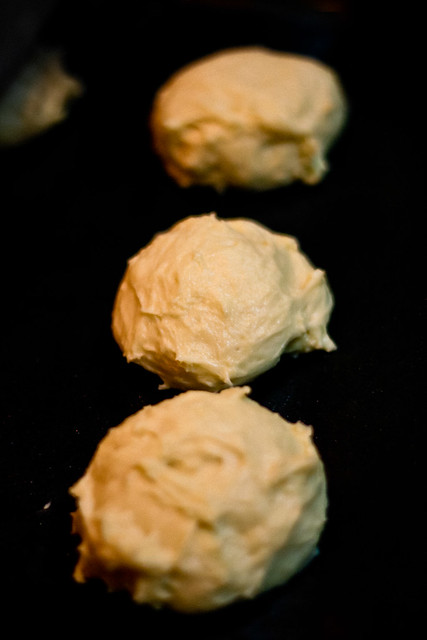 |
| 5. Remove from bowl and reshape it as desired. |
 |
| 6. Shape into logs (I rolled in a sausage in them) or balls (these are plain) and add a wash of milk or whisked egg (as shown above). |
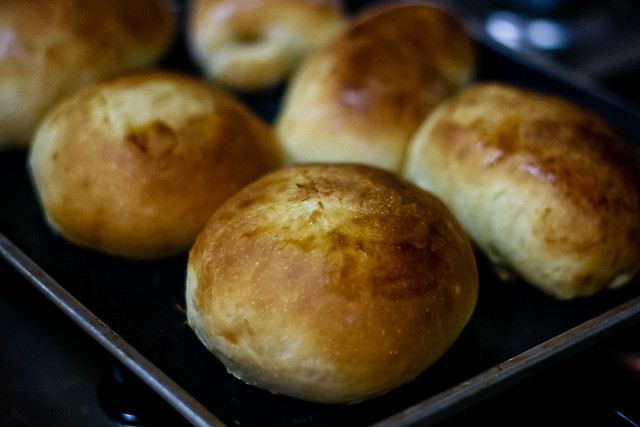 |
| 7. And Voilà! The buns are done after 20 minutes or so in the oven :) |
PS: The initial kneading process really is very messy, so if you have a bread machine, do feel free to use it to do the initial kneading for you! I'll come up with a slightly modified recipe for those with bread machines sometime later!
4 comments:
Your illustration is very pro and technical. Love your detailed explanation of how tangzhong forms and works.
I'm very addicted to making tangzhong breads. So far, I found it's the best method to make soft and fluffy Asian buns/breads.
Congrats on your baking success!
Thanks for your comment Christine!
I was just wondering, have you ever increased the amount of tangzhong in the recipe to perhaps double? Does it make the bun even more fluffy? Heh :)
Wow! this is the first time I ever saw someone use a diagram to describe the tangzhong process. Very interesting! Thanks for stopping my blog. Keep up your blogging. :) I'm liking the recipes you're trying.
P.S. I don't know for sure, but I don't think doing that to with the tangzhong is that good of an idea because then the dough would be too wet. There probably wouldn't be enough gluten, unless you added more flour, which would kind of defeat the purpose of adding more tangzhong. I'm not sure though, and this is only my hypothesis. :D So if you do ever try it out, please share the results with me.
Thank you for posting such a useful, impressive and a wicked article./Wow.. looking good!
Wow it super perfect taste!
Bakery Equipment
Post a Comment